Monday, May 20, 2013
Today I have a tutorial for a tag I made using Amy Marie's kit Strawberry Dreams. I have joined her CT team on a trial basis to see if I can handle writing tutorials. Please be patient as I am REALLY rusty in writing tutorials.
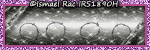
PTU Strawberry Dreams by Amy Marie
 *Click on image for full size*
This tutorial was written by me, on May 20, 2013. These ideas are mine and any likeness is just a coincidence.
You must have a working knowledge of PSP. I use PSP 9 but other versions should work as well. Remember to save often!
Today I am using the Artwork of Ellie Milk which you must have a license to use. You can obtain this license at PFD
I am using the PTU scrapkit by Amy Marie called Strawberry Dreams. You can purchase this kit at PFD or SATC
You will need: Mask of choice and Plugin Xero-Porcelain
Lets get to it!!
Open New Image 600x600- make sure transparent is checked.
Open Element 77, copy/paste as new layer. Image resize 70%>Image rotate> free rotate left 30.00
Click inside of frame using magic wand tool > Selection, modify 6.
Open paper 11 > Copy/Paste as new layer, Selection, invert, delete. Move under frame layer.
Select the frame back layer- Selection, select all, float, defloat
Copy and past your tube of choice > Selection, invert, delete. Lower opacity to 70. Apply Xero- Porcelain with these settings:
 Click on the layer for the frame back- Effects, texture effects, blinds and use these settings:

Open element 57, copy/paste as new layer. Move layer to top, resize 70%, add drop shadow, move over to right side of frame.
Duplicate layer > mirror and move down just a little bit. See tag for reference.
Open element 8, copy/paste as new layer resize 70% , add drop shadow, move to bottom of frame.
Open element 67 copy/paste as new layer. Resize to your liking. Duplicate 3 times resizing each to what you like. I did 2 smaller flowers and medium size flowers. Place where you like or see my tag for reference.
Copy and paste your tube of choice and place over on the right side of the frame. Position where you want and add drop shadow.
Open Element 127 copy/paste as new layer, resize 70% and place just underneath your outside tube layer.
Open Element 49 copy/paste as new layer, resize by 70% 3 times. Place in lower left hand corner. Add drop shadow.
Open Element 50 copy/paste as new layer, image > mirror. Move underneath element 49. Resize by 70% 3 times. Add drop shadow. See my tag for reference.
Open Element 43, copy/paste as new layer. Resize 70% 3 times. Add drop shadow. Place near bottom of tag. Again, use my tag as a reference.
Open paper 11 copy and paste as new layer. Move down to second to last layer.
Open mask of your choice and minimize. Make sure paper layer is highlighted. Layers > new mask layer > from Image- click arrow and select your mask image, click ok. Delete mask layer, merge group.
Add copyright and name. I used the font Contribute.
That's It! All Done! Thanks for trying my tutorial.

PTU Strawberry Dreams by Amy Marie

This tutorial was written by me, on May 20, 2013. These ideas are mine and any likeness is just a coincidence.
You must have a working knowledge of PSP. I use PSP 9 but other versions should work as well. Remember to save often!
Today I am using the Artwork of Ellie Milk which you must have a license to use. You can obtain this license at PFD
I am using the PTU scrapkit by Amy Marie called Strawberry Dreams. You can purchase this kit at PFD or SATC
You will need: Mask of choice and Plugin Xero-Porcelain
Lets get to it!!
Open New Image 600x600- make sure transparent is checked.
Open Element 77, copy/paste as new layer. Image resize 70%>Image rotate> free rotate left 30.00
Click inside of frame using magic wand tool > Selection, modify 6.
Open paper 11 > Copy/Paste as new layer, Selection, invert, delete. Move under frame layer.
Select the frame back layer- Selection, select all, float, defloat
Copy and past your tube of choice > Selection, invert, delete. Lower opacity to 70. Apply Xero- Porcelain with these settings:


Open element 57, copy/paste as new layer. Move layer to top, resize 70%, add drop shadow, move over to right side of frame.
Duplicate layer > mirror and move down just a little bit. See tag for reference.
Open element 8, copy/paste as new layer resize 70% , add drop shadow, move to bottom of frame.
Open element 67 copy/paste as new layer. Resize to your liking. Duplicate 3 times resizing each to what you like. I did 2 smaller flowers and medium size flowers. Place where you like or see my tag for reference.
Copy and paste your tube of choice and place over on the right side of the frame. Position where you want and add drop shadow.
Open Element 127 copy/paste as new layer, resize 70% and place just underneath your outside tube layer.
Open Element 49 copy/paste as new layer, resize by 70% 3 times. Place in lower left hand corner. Add drop shadow.
Open Element 50 copy/paste as new layer, image > mirror. Move underneath element 49. Resize by 70% 3 times. Add drop shadow. See my tag for reference.
Open Element 43, copy/paste as new layer. Resize 70% 3 times. Add drop shadow. Place near bottom of tag. Again, use my tag as a reference.
Open paper 11 copy and paste as new layer. Move down to second to last layer.
Open mask of your choice and minimize. Make sure paper layer is highlighted. Layers > new mask layer > from Image- click arrow and select your mask image, click ok. Delete mask layer, merge group.
Add copyright and name. I used the font Contribute.
That's It! All Done! Thanks for trying my tutorial.
Subscribe to:
Post Comments
(Atom)
Grab My Blinkie

Proud Mod


I CT For


Awesome Blogs


0 comments:
Post a Comment